Sitting Infant, Not Yet Crawling? Try This Simple Outdoor Water Play Activity (Great For Summer)

She loved it.

And we didn’t even have to leave home.

I found this activity at the exact right time too, since I had been looking for a simple water-play activity for her.

What is it?

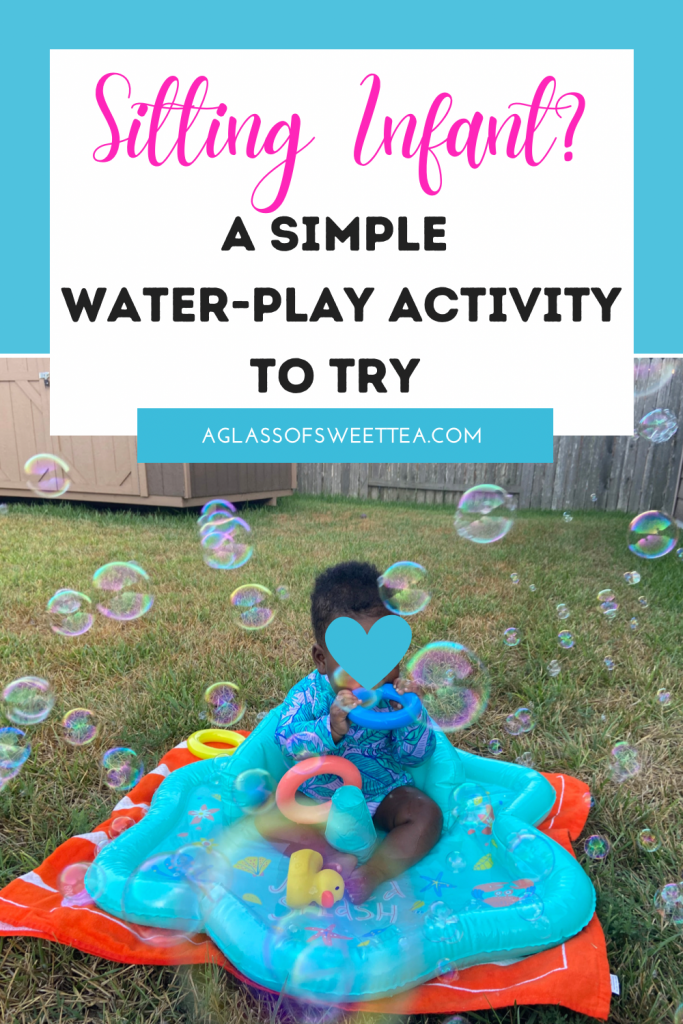
A splash mat – the perfect activity for us.

If your baby is sitting independently, but not crawling yet, then this will work for you, too.

Splash Mat Chat

This splash mat activity worked well for us because it allowed us to make our own fun at home, cut out travel time, and work around her naptimes.

Plus, we could do it whenever we wanted.

In her early infancy, taking Plum out felt like a huge endeavor. One any given day – Would she be in a good enough mood to ride around? Would I remember everything I needed for her? Try as I might, I occasionally forgot things at home.

And I won’t even mention rushing home to get her in bed for nap time (flying pigs would not have caused me to miss that, since it was also my quiet-time)!

For those reasons, I was super-motivated to find more opportunities for fun, and play, at home.

If you want to give it a go, here’s how you can prepare this activity for your little one-

This post contains affiliate links. If you make a purchase using one of these links, I could earn a small fee, at no additional cost to you.

Items You’ll Need

Although this activity is super simple, I recommend that you prepare for it in advance.

You’ll Need:

♥ Baby Splash Mat – with canopy, without canopy
Electric Air Pump, or your own breath 🙂
♥ Baby Swimsuit
Swim Diapers – I grabbed the reusable ones….New mom moment: did you know that swim diapers don’t hold urine, only poo? And that goes for the disposable ones, too!
Sunscreen, to protect baby’s skin, and because babies can even sunburn in the shade.
♥ Pitcher, or Large Bowl of Water
Sun Protection Baby Hat (optional in the shade, or if using a mat with a canopy)
Bubble Machine (optional, but it sure makes things a lot more fun!)
Bubbles, for the machine (optional)

Extras:

♥ Floating toys, additional ones
♥ Drying towel, for baby
♥ Change of Clothing, for baby
♥ Cardboard or towel, to go underneath the splash mat (for an extra layer of protection from bugs and ants)
♥ Chair, for mommy
♥ Cool drink, for mommy
♥ Small table, for mommy’s drink
♥ Music, for ambiance (small portable speaker, or your phone)

Prep & Setup, Step-by-Step

1. Decide on a day.

Take a look at the forecast to make sure the weather will be good.

2. Decide on the time of day.

Be mindful of the temperature, humidity, and where the shade will be, as you decide the time of day.

5:30 – 6:15 PM was our typical start-time for 2 reasons: our backyard is shady during that time, and it’s also when the Summertime Houston humidity is most bearable (dewpoints around 68 degrees).

Suggestion: Consider waiting 30 minutes after baby has eaten before doing this activity.

3. The night before the activity, inflate the mat, check the batteries in the bubble machine, and gather everything you need. Put the items in a box, or container.

4. On the day of the activity, 30-60 minutes before your start time, set up these 3 things: indoor dressing space, outdoor play area, and indoor dry-off space.

Indoor Dressing Space

Lay out baby’s swimsuit and swim diaper, for quick dressing.

Fill your beverage container during this step, too.

TIP: If playtime will end around baby’s next feeding, have their bottle ready to go. their next feeding time, have a bottle ready to go.

Outdoor Play Area

Set up your play area.

Take these items outside:

splash mat
pitcher of water
bubble machine
bubbles
chair

small table
beverage
portable speaker
drying towel
box, or towel

TIP: Use the pitcher, or bowl, to pour water on the splash mat. It’s so much easier than having to unwrap and re-wrap the water hose.

Indoor Drying Space

Lay baby’s changing mat on the bed along with a fresh diaper, wipes, and dry clothing.

5. Take baby out for some water fun in the sun! Baby will be occupied on their mat, while you monitor and enjoy the outdoors.

Remember, NEVER leave a baby alone around any amount of water. Babies can drown in just 1-2 inches of water.

We typically stay outside for about 45 minutes before she’s ready to call it quits.

6. Once you’re finished, take baby to your Indoor Drying Space, where you’ll dry them off, and get them dressed.

Water play really exhausts babies, so expect naptime.

7. At naptime, clean up and return all items to the box for the next time.

A Simple Way For Baby To Self-Entertain

Plum always had a ball with this activity. She reached for the bubbles, chewed on the rings, and played with the duckies, all while enjoying the sights and sounds of the outdoors.

Here’s to your baby enjoying it, too!

All the Best,
Ash

P.S. Jump back to the list of what you’ll need.

New Mom, Baby’s First Cold: 7 Great Products To Help With Relief, Comfort, and Management

cough, cough, cough

That’s your infant.

And, it’s their first time catching a cold.

I remember Plum’s first time well – she was 4 months old. And this first-time mama had no clue what to do.

I’m going to let you in on a little something: there isn’t much you can give an infant with a cold. No expectorants or cough suppressants, only a fever reducer/pain reliever, if they need it.

The main thing you want to do is to keep them comfortable by managing their symptoms, as their little immune systems learn what to do.

So how can you help relieve your little one when they have a cold?

Note: When in doubt, please consult your Pediatrician for medical advice.

This post contains affiliate links. If you make a purchase using one of these links, I could earn a small fee, at no additional cost to you.

7 Items to Have On Hand For Baby’s First Cold

These are the items I have in, what I fondly refer to as, Plum’s “Sick Kit”:

1. Zarbee’s Baby Soothing Chest Rub (2+ months)

What It Does: It helps relieve a stuffy nose, and helps baby breathe easier.

How To Use It: Rub some on baby’s back, neck, chest, or the bottom of their feet.

Tips For Use: You can use this during any time of the day but, per the label – no more than 3x within 24 hours (unless directed by your pediatrician).

I save all of my applications for nighttime so she can breath better as she sleeps. Because if she doesn’t breathe well, neither one of us gets any sleep.

2. American Red Cross Nasal Aspirator

Of the 3 manual aspirators I’ve had, this one is my favorite.

It has a little notch that prevents you from inserting the tip too far up baby’s nose, and I really appreciate that.

What It Does: Suctions the mucus out of baby’s nose, since they haven’t yet learned how to blow it.

How To Use: Squeeze and hold the bulb-end to release the air inside, insert the tip into baby’s nostril, then release the bulb-end to suck out the boogies. Repeat with the other nostril.

Tips For Use: For small babies, aspirating no more than 3x per day is recommended. Aspirating more often can lead to discomfort, since they don’t have cartilage in their noses yet.

The electric aspirators have recently caught my eye, and I’m keen to try one.

3. Little Remedies Saline Spray and Drops (Non-Medicated, 0+ months)

What It Does: Loosens the mucus in baby’s nose, making it easier to aspirate. It also provides relief for stuffy, dry and crusty, or runny noses, and keeps baby’s nose clear and moisturized.

How to Use: While baby is laying down, drip a few drops into each nostril, then aspirate.

Tips for Use: I only use this 3x per day (and only when I aspirate) because I don’t want her nasal passages to become irritated or swell. I’ll apply the drops and aspirate right before bedtime, at nighttime feedings, and in the morning, once she’s up for the day.

RELATED: Snot Sucker Kit

4. Digital Thermometer

We use a regular ‘ol digital thermometer, ours came in the American Red Cross Baby Kit.

What It Does: Reads baby’s body temperature (so you can determine if they have a fever).

How To Use: Although there are a couple of ways you can take baby’s temperature, I am most comfortable taking it from her armpit.

Press the button on the thermometer to turn it on, place it securely in baby’s armpit, and hold baby’s arm in place so the armpit maintains good contact with the thermometer.

When you hear the beep, remove the thermometer, and read the temperature displayed in the window.

Tips For Use: Make sure the thermometer makes good contact with baby’s armpit at all times, for the most accurate temperature reading. Or, use an ear, or forehead, thermometer.

5. Vicks Waterless Vaporizer (10+ pounds)

I chose this vaporizer instead of a humidifier because the air where we live is already plenty humid. Over-humidifying the air only serves to keep baby sick longer, because they’re breathing in air that has too much moisture (i.e. is too wet).

I also have a thermometer that displays relative humidity, in addition to the temperature, so it tells me if the air in the room where it’s housed is too dry, comfortable, or too wet.

What It Does: Helps relieve cough and congestion.

How To Use: Place a scent pad inside the vaporizer, and plug it into an electrical outlet. The scent pad heats up and releases menthol vapors into the air for baby to breath in.

Tips For Use: This can get overpowering in a small room, so leave the door open, and use in short bursts. The bright green light doesn’t shut off, so baby may wake up if she sees it, or may have trouble falling asleep.

Per the label, this product is not recommended for infants that weigh less than 10 pounds. Do not use more than 2 pads within a 24 hour period for babies weighing 10-22 lbs.

Another option: If you aren’t keen on the VapoPads that have menthol as an active ingredient, two more options are to use Vick’s Rosemary, Lavender, and Eucalyptus Pads, or a cool-mist humidifier if the air in your home is dry.

Cool-mist humidifiers are recommended over warm-mist humidifiers (also known as a vaporizer, but one that utilizes water) in homes that have pets and children, because it won’t burn baby or pets if they come in contact with it.

6. Boogie Wipes

What It Does: Helps dissolve snot and boogers, prevents skin irritation from frequent nose-wiping, and moisturizes baby’s skin.

How to Use: Just like Kleenex, wipe baby’s runny nose with these.

Tips for Use: Use as often as desired.

7. Infant’s Liquid Tylenol

I give Infants Liquid Tylenol to help with fever and general discomfort.

What It Does: Helps reduce fever and minor aches & pains related to flu, headache, the common cold, and teething.

How To Use: Consult your pediatrician for proper use and dosage.

BONUS: Steam Shower

What It Does: Loosens mucus and relieves nasal congestion.

How To Do: In a small bathroom, close the door, and run the shower on warm to hot for 5 minutes, allowing it to fill with steam.

Get your saline wipes and a drying towel, then take baby into the bathroom for a few minutes. I prefer to leave the shower running. Be sure to stay standing, since steam rises. You will get the best result that way.

Tips: When you’re finished, if baby is sweating, wipe them off before you leave the bathroom, especially if the air in the home is cool. You don’t want to take a wet baby into cool air.

Now You’re Ready For Baby’s First Cold

In a nutshell, Plum’s Sick Kit includes: chest rub, nasal aspirator, saline nose drops, digital thermometer, Vick’s Waterless Vaporizer, saline nose wipes, and Infant’s Liquid Tylenol.

It’s good to have these items on hand, so they’re ready to go when you need them.

Here’s wishing your baby a speedy recovery and lots of sweet rest.

All The Best,
Ash

14 Popular Baby Items, How Long Do They Last? (for new moms)

This new mom had tons of questions.

But, this one was particularly pressing.

Why, of all questions?

I still can’t figure it out.

Let’s just blame it on my left brain – always planning, always preparing, always wanting to know what to expect.

But hey, maybe you’re the same way. Do you like to know what to expect, ahead of time?

Then this list is for you.

14 Common Baby Items & How Often To Replace Them

Can I let you in on something?

As a new mom, your experience will most likely differ from mine. Each mom is an individual, and so is their baby.

That said, I can still get you in the ballpark of how long it might be until you replace the baby items listed below.

But, before we get into the list, for reference’s sake –

♥ I birthed a full-term, average-sized baby girl, who weighed just under 7 lbs.
♥ She didn’t have any health concerns.
♥ Babies are expected to triple their birth weight by their first birthday.
♥ My baby nearly tripled hers by the time she reached 6 months old.
♥ You’ll replace perishable items more frequently as your baby grows in age and size.

Now, onto the list (finally! lol) –

CONTENTS:

This post contains affiliate links. If you make a purchase using one of these links, I could earn a small fee, at no additional cost to you.

Formula

Replaced: Every 8-10 days, for the first 8 weeks, using a 29.8 oz. can (845. grams).

Plum drank around 24 ounces per day from the time she turned 2 weeks old, until she was 8 weeks old.

Replacement time varies based on how many grams are in the entire formula container (see the front label), verses the amount of grams you’ll use to make a bottle (see the back label).

Your math: Number of grams per container ÷ Number of grams use to make one bottle ÷ Number of bottles you make per day = Amount of days your container will last.

Example: 845 grams in the formula container ÷ 8 grams used to make a bottle ÷ 12 bottles made per day = 8.8 days until you’d buy more formula

You’ll replace formula more often as baby grows and begins to require more per feeding.

RELATED: How To Set Up A Bottle Station (For Formula Feeding)

Bottled Water

Replaced: Every 2.5 weeks for a case of water containing (48) 16.9 oz bottles.

Your math, step 1: Number of ounces you use to make a bottle × Number of bottles you make per day = Number of ounces of water used per day

Example: 2 oz. use to make a bottle × 12 bottles made per day = 24 ounces of water used per day (keep this number in mind, you’ll use it in the next step.)

THEN

Your math, step 2: Total number of ounces in your package of water (see the front package label) ÷ Number of ounces of water used per day = Number of days your package of water will last

Example: 405.6 fl. oz. of water in the entire container / 24 oz. of water used per day = 16.9 days until you’ll need to buy more water

You’ll replace water more often as baby grows, and as you need more water to mix with the formula.

RELATED: How To Warm Baby Bottles Without The Microwave

Diapers

Replaced: Every 2.5 weeks, for a box of 210.

We used about 12 diapers per day, when Plum was a newborn. Every time we fed her, we changed her diaper, too, roughly every two hours, or so.

Your math: Number of diapers in your package ÷ Number of diapers you use per day = Number of days your container will last

Example: 210 diapers in the packages ÷ 12 diapers used per day = 17.5 days until you’ll need to buy more diapers

You may replace diapers less often as baby grows and requires less diaper changes per day. But there’s a caveat – as diaper sizes increase, the number of diapers per container decrease.

Wipes

Replaced: Every 6.5 weeks, for a box of 1100 wipes.

During the first 2 months, we had about 3 dirty diapers, and 9 wet ones, per day.

We used 1 wipe per wet diaper, and 3-4 wipes per dirty diaper.

Your math, step 1: Number of dirty diapers × number of wipes used per dirty diaper = Number of wipes you use on dirty diapers per day

Example: 3 dirty diapers × 4 wipes used each time = 12 wipes used on dirty per day

THEN

Your math, step 2: Number of clean diapers × number of wipes used per clean diaper = Number of wipes you use on clean diapers per day

9 clean diapers × 1 wipe used each time = 9 wipes used on cleans diapers per day

THEN

Your math, step 3: Number of wipes used on dirty diapers per day + Number of wipes used on clean diapers per day = Total number of wipes used per day

Example: 12 wipes used on dirty diapers each day + 9 wipes used on clean diapers each day = 21 wipes used per day

Your math, step 4: Number of wipes in a container / Total number of wipes used per day = Number of days your wipes will last.

Example: 1100 wipes in the box ÷ 21 wipes used per day = 52.38 days until you’d need more wipes.

You’ll replace wipes less often as baby grows and requires less diaper changes per day. Unless you use them for other things like cleaning small hands, and wiping up messes.

RELATED: Start A Baby Registry

Nipples

Replaced: At 2 months old, we switched from Newborn nipples to Level 1 nipples.

As baby grows, they are able to handle increasingly faster flows hence the reason to replace them. It also enables them to finish a bottle faster, too.

After that, Levels 2 thru 4 are replaced, respectively, at four, six, and finally, when baby is nine months old.

Some bottles brands have different names for each nipple level, but these are the general nipple replacement ages.

Dish Detergent

Replaced: Every 8-10 weeks, for a 19 fl. oz bottle of dish detergent.

It lasts a while, even with semi-generous use.

The replacement time remains consistent throughout baby’s first year, as long as you continue to wash bottles, and baby items, at the same interval, and use a similar amount each time.

Clothing

Replaced: Plum’s newborn clothing was replaced after 5 weeks.

She was an average-sized girl at birth, coming in at just under 7 lbs.

Her weight took off when she turned 2 months old, and she grew so fast that she outpaced the suggested age on the clothing labels. So, her clothes got replaced way more frequently.

During the first year, it seemed that she was only about to make use of them for about 2 months, before we needed to size up.

You’ll replace clothing based on how quickly your individual baby grows.

RELATED: Newborn Essentials: Every Single Item I Used Within The First 7 Days

Lotion

Replaced: 3 months

At 4 weeks old, I started apply lotion to Plum’s skin every morning. I used it before that, too, just not as often.

I also applied it in the evenings on bath days, which was every 3 days, as to not dry out her sensitive baby skin.

Even with frequent use, it lasted about 3 months.

You’ll replace lotion slightly more often as baby grows in size.

Laundry Detergent

Replaced: 3 months.

I did Plum’s laundry every 5-7 days to avoid washing a mountain of baby clothes and having to fold lots of tiny items at once.

The replacement time remains consistent throughout baby’s first year, as long as you continue to do laundry at the same interval, using a similar amount of detergent each time.

Baby Wash + Shampoo

Replaced: 4 months old

Plum got a bath every 3 days.

I’d bathe her twice using 2 generous pumps of baby wash, and wash her hair once, using another pump.

Even with that, her baby wash lasted quite a while.

You’ll replace baby wash and shampoo more frequently as baby grows in size.

Bottles

Replaced: Around 5 months old

Plum was a below-average eater, so we didn’t switch from 4 oz. bottles, to 8 oz. bottles, until she started her 5 oz. feedings, which was between 5 and 5.5 months.

For an average eater, you’d typically switch when baby is around 4 months old.

RELATED: How I Stayed Awake & Alert For Newborn Nighttime Feedings

You’ll replace bottles just this one time.

Bassinet

RELATED: How To Choose The Right Bassinet For Your Baby

Replaced: Not until 6 months.

Although, it actually should have been replaced when she was 5 months old.

RELATED: Our Bassinet, In Review

You’ll replace their bassinet once.

The next time you’ll replace their sleep environment, depends on whether you choose a standard crib, convertible crib (converts to toddler bed), or play-yard. Check the manual for how long baby is safe to sleep in the environment.

Drying Towels

Replaced: Around 9 months old.

The newborn length lasted a good while, so it wasn’t necessary to replace these until she was about 28 inches long.

You’ll replace drying towels based on the size of the initial towels, and how quickly your individual baby grows.

Baby Carrier

Replaced: Around 11 months old.

Plum reached the maximum height, and weight, limits for her carrier around the same time.

When you’ll replace varies by manufacturer, and model, so be sure to check the manual.

You’ll typically replace this once, when you upgrade to baby’s next seating option.

Now You’re In The Ballpark

Now that you have a general idea of how long these items last, I hope planning and preparing becomes that much easier.

All the Best,
Ash


11 Cute Easter Books For Babies and Young Toddlers (Great for Easter Baskets or Bookshelves)

We’re ready!

…ready for bunnies, egg hunts, Peeps, dying eggs, and Easter baskets.

And for Easter books, too!

If you’re looking for Easter books to add to baby’s Easter basket, or bookshelf, then this list is for you.

Easter Books For 0-18 Month Olds

All of these are board books, unless otherwise indicated. Some are storybooks, although not all are (I point out the ones that are). The Publishers’ suggested ages may different from the 0-18 month range, but I think these are all appropriate for infants & young toddlers.

This post contains affiliate links. If you make a purchase using one of these links, I could earn a small fee, at no additional cost to you.

1. The Itsy Bitsy Bunny

Features: Rhyming

A sweet Easter nursery rhyme inspired by the Itsy Bitsy Spider.

2. Bright Baby Touch and Feel Easter (Great for Young Infants)


Features: Photographic Images, 3 Touch & Feel pages

Introduce your baby to new words with this cute book featuring Easter-related images. Each image is paired with a single word such as Easter basket, chocolate eggs, and bunnies.

Baby is also able to touch and feel glitter, foil, and fabric textures.

3. Llama Llama Easter Egg


Features: Rhyming, Storybook

What goodies does the Easter Bunny have in store for Llama Llama?

Find out in this cute Easter story.

Jelly beans, colorful eggs, and a fluffy surprise, are also featured.

4. Happy Easter, Little Pookie

Features: Rhyming, Storybook

Join Pookie and her mom as they prepare for Easter.

Pookie’s friend bean joins the festivities. They have fun decorating eggs and hopping around like bunnies.

When the day is over, Pookie dreams of chocolate, and the Easter Bunny.

5. Disney Baby My First Easter

Features: Rhyming, Touch & Feel

Disney characters like Bambi, Bo Peep, and Alice pair with adorable, straightforward illustrations, and text, to introduce baby to Easter-related words like Easter Basket, bonnet, and jellybeans.

6. Easter on the Farm: A Seek & Find Flap Book


Features: Rhyming, Lift-a-Flap, Photographic Images

Look for the different-colored egg in each farmyard scene, by lifting the flaps.

You might even find some Springtime images, like flowers and baby farm animals.

7. Peek-a-Flap Hop


Features: Chunky Board Book, Lift-a-Flap, Sturdy Flaps

Lift the flaps to: help decorate pattered and colored eggs, find out about Easter traditions, and for fun facts about the occasion.

This adorable book illustrated with chicks, bunnies, and eggs.

8. Babies Love Easter (Great for Young Infants)


Features: Chunky Board Book, Lift-a-Flap Book, Sturdy Flaps

A cute book about all things Easter-related like jelly beans, eggs, festive hats, animals, and the Easter Bunny.

9. Happy Easter, Little Bunny


Features: Rhyming, Storybook, Photographic Images

Little Bunny hunts for Easter eggs in his garden, along with his friend Mouse, until a pesky ‘ol fox attempts to ruin the fun.

10. Hippity, Hoppity, Little Bunny

Features: Finger Puppet, Rhyming

Bunny and his bird friends hunt for Easter eggs in this cute finger-puppet book.

Put your finger in the back of bunny to make him come alive.

11. The Great Easter Race! (Great for 18+ Months)


Features: Hardcover, Rhyming, Storybook

Follow your favorite Sesame Street characters at the park as they gather for the Great Easter Race.

Who’s going to be there?

None other than Elmo, Cookie Monster, Big Bird, and a few more of their friends.

Happy Reading!

Your little one is sure to love any of these adorable Easter books.

But the most special thing of all, is the time you spend bonding and making memories together.

And, reading is an awesome way to do just that.

All the Best,
Ash

Newborn Essentials (Every Single Item I Used In The First 7 Days)

Knowing what to purchase as a new mom can be a challenge.

There are lots of common sense things to buy for your baby, but there are things that might get overlooked, too.

I’m going to share with you every single item I used in the first week after we were discharged from the hospital.

Contents:

This post contains affiliate links. If you make a purchase using one of these links, I could earn a small fee, at no additional cost to you.

Here is what we used –

Continue reading “Newborn Essentials (Every Single Item I Used In The First 7 Days)”

7 Ways To Warm Bottles That Aren’t The Microwave

Microwave bad.

That’s what we’re told when it comes to heating up baby bottles.

Why? Because they are notorious for uneven heating. And we don’t want to burn baby’s mouth by mistake.

So, what are some other ways we can heat baby bottles?

I’m going to share 7 ways to do just that.

But first, a little housekeeping...

#1: Did you know that formula doesn’t need to be warmed? It can be served at room temperature.

#2: With any bottle warming method, you always want to test the formula on your wrist by dripping a few drops from the bottle, before each feed. You want it to feel close to body temperature. If it feels cool, warm it a little more. If it feels too warm, allow it to cool a bit. You can use an ice bath to cool it quickly, if you’re in a pinch.

#3: If you’re using any water other than bottled water (i.e. tap water, well water, etc.), check to see if there are any additional warming advices for your water source.

#4: To correctly make a bottle, add the water first, then add the formula. This will give you the proper mixture. Read the label on your formula container for further instructions.

RELATED: Make Newborn Nighttime Feedings Easier With A Bottle Station
(for formula-fed babies)


There are 2 general ways to do this: warming the entire bottle including its contents, or warming the water first then adding it to the bottle, and mixing in the formula.

Continue reading “7 Ways To Warm Bottles That Aren’t The Microwave”

How I Stayed Awake During Newborn Nighttime Feedings

Do you hear that sound?

Your baby is awake and is fussing to be fed.

You?

You’ve just gotten into a good sleep.

Now here you are, dragging yourself from your slumber for the feeding.

As much as you love your little one, those moments sure can be tough when you’re sleepy and tired.

How can you get baby fed and back to sleep, while not dozing off, yourself?

This worked for me…

Continue reading “How I Stayed Awake During Newborn Nighttime Feedings”

Make Newborn Nighttime Feeding Easier With A Formula Bottle Station

You’re tired.

And your baby has just woken up for one of their nighttime feedings.

Through hazy vision you stumble to the kitchen, maybe bump into a wall or two along the way, and mix a bottle. But then it dawns on you that you’ve mixed it all wrong. All while your baby has gone from crying to screaming.

And you’re exhausted.

I get it.

I used to do it too – make each bottle one at a time, waste formula by mistake, and run into walls in the middle of the night in a hurry to get back to my hungry baby.

But I found a simpler way: a bottle station. It helps making nighttime (and daytime) bottles a breeze.

How To Setup A Bottle Station
(for formula feeding)

Continue reading “Make Newborn Nighttime Feeding Easier With A Formula Bottle Station”

How to Hire A Freelancer on Fiverr

Hiring your first freelancer can be overwhelming.

But, it doesn’t have to be.

You might be wondering-

How do I choose the right person? How do I make sure I don’t get scammed? And, how can I have a positive first experience?

I’m going to share the process I used to successfully find, and hire, my first freelancer on Fiverr.

Now, let’s get you on the road to finding one for yourself.

If you already have someone in mind, simply follow these steps to hire them.

How To Find A GOOD Freelancer

Continue reading “How to Hire A Freelancer on Fiverr”

First Time Fiverr Buyer? Should You Go For It?

A screenshot of Fiverr's homepage. It has a forest green background with a Black woman in a navy blue sleeveless top. She has shoulder length kinky-curly hair, and is wearing red lipstick. There is a search bar, for finding freelancers, as well as other ways to navigate, such as become a seller, login, and changing the language and currency. It's in a Fiverr review article.

How much can you actually get for $5?

Not much, I’d say.

That’s exactly what I thought of Fiverr after hearing it pitched as a marketplace where you can hire someone to complete a task for the low price of $5.

But, that was a long time ago.

More than 10 years after I’d hear that initial pitch, I’d learn it was that, and more.

Let’s talk about it.

Is Fiverr Any Good?

If you’re anything like I was, you probably want to know if it’s possible to find good services, and sellers, on Fiverr.

Before I used it, I didn’t know anyone in my personal life who’d hired from there, so, naturally, I was skeptical.

But, since I was already in the market for a career coach, and all of my efforts to find one amounted to dust, I gave it a shot.

The good news is that through Fiverr, I was able to find a career coach, who, is not only great at what she does, but was the right fit for me.

So much so, that we ended up working together SIX times and I have plans to work with her again, in the future.

And with that, my first hiring experience was a success!

Two Things I Really Like About Fiverr

1. Global Marketplace

Fiverr is a global marketplace, with sellers, and professionals, from all over the world.

Interesting fact: my career coach lives in Europe.

Was I looking across the pond for a career coach?

Nope.

But, I was able to find one based on the right fit, instead of being limited by geography, because of Fiverr.

This is a screenshot from Fiverr's desktop website featuring popular professional services such as logo design, voice over, video explainer, social media, and wordpress. It's in a review of Fiverr article.

2. Multiple Service Tiers

Fiverr allows sellers to offer up to 3 tiers of service.

Each tier (Basic, Standard, Premium) comes with a different level of service and pricing, and builds on the one before it. I like this because you can choose the one that, not only best meets your needs, but is most comfortable for your pocketbook.

Like the insurance company says – “only pay for what you need”.

This post contains affiliate links. If you make a purchase using one of these links, I could earn a small fee, at no additional cost to you.

Tips for The First Time Fiverr User

With so many sellers on Fiverr, you’re likely to find lots of individuals offering your desired service. So, my first tip is to check out multiple sellers before choosing one, even if you think you’ve found “the one” right away.

Take a look at each one’s samples, Frequently Asked Questions (FAQ), and reviews.

You’ll find samples, if any, by swiping a seller’s header image to the left on the app, or by pressing the right-arrow icon on the desktop site.

Additional samples maybe available under the section called My Portfolio.

Always review the Frequently Asked Questions. There you’ll usually find the seller’s history, credentials, and what qualifies them to offer the service. You’ll also find information that may not be listed elsewhere such as, “please reach out to me before ordering”, and similar things.

This is a screenshot from Fiverr's desktop website showing the page you go to after clicking explore from their homepage. There are 9 categories in this image, including Graphics & Design, Business, and Music & Audio.

Read the reviews, but also understand that not every seller will have reviews; the newer ones, in particular (more on this in a moment). But for the ones who do, read them – the good, the bad, and the ugly.

I suggest reading some 5, 3, and 1 star reviews to get a big picture understanding of: the quality of the service, their professionalism, potential issues, and what it might be like to work with them.

I also suggest giving more weight to more recent, and detailed, reviews rather than say, a one-off from 2 years ago, or one that’s short and sweet like – “great seller, will definitely use them again”.

Alright, let’s circle back around to talk about new sellers. Consider giving new sellers a shot. There’s more risk involved than working with an established seller, of course, but often times their prices are more affordable and their service may be just as good as established sellers.

Here’s why: a lot of newer sellers price their services low to get the ball rolling. Once they’ve gotten their first few clients, and received some good reviews, they usually raise their prices.

And don’t hesitate to reach out to them to get a better feel for them, if you are considering placing an order.

Test the waters. By this I mean, consider going for a lower-priced service tier, at first. This helps you in a couple of ways. You can get a feel for the seller and their work before spending a heap. It also helps you skirt sellers who are not the right fit for your project. Plus, it’s a smaller hit to your pocketbook, in case you decide to use someone else.

In addition to finding the best person to do the work, consider who you’d work best with. This is especially important if you’ll be working closely with the seller – think coaching services, or something similar.

Create an account so you can “save” the people whose services you’re considering. This makes it easy to return to the listing. Save yourself time and a headache. Trust me on this one.

This is a screenshot from Fiverr's desktop website that lists the benefits of hiring a freelancer through Fiverr. There are 2 women looking at a laptop on the right side of the screen. On the left side the benefits are: the best for every budget, quality work done quickly, protected payments every time, and 24/7 support.

How I Look At Fiverr Now

Can you get anything good for $5?

Maybe, just maybe.

But you’ll find that and more on Fiverr. You will find legit sellers that provide great service.

Although I’ve only worked with one person from Fiverr, I would hire from there again, hands down. I’ve even started looking for Spanish tutors. 😛

Here’s to finding your best seller.

Happy Hunting!

xo,
Ash

P.S. A final tip – use a desktop, or laptop, to see more sellers’ listings at a time.